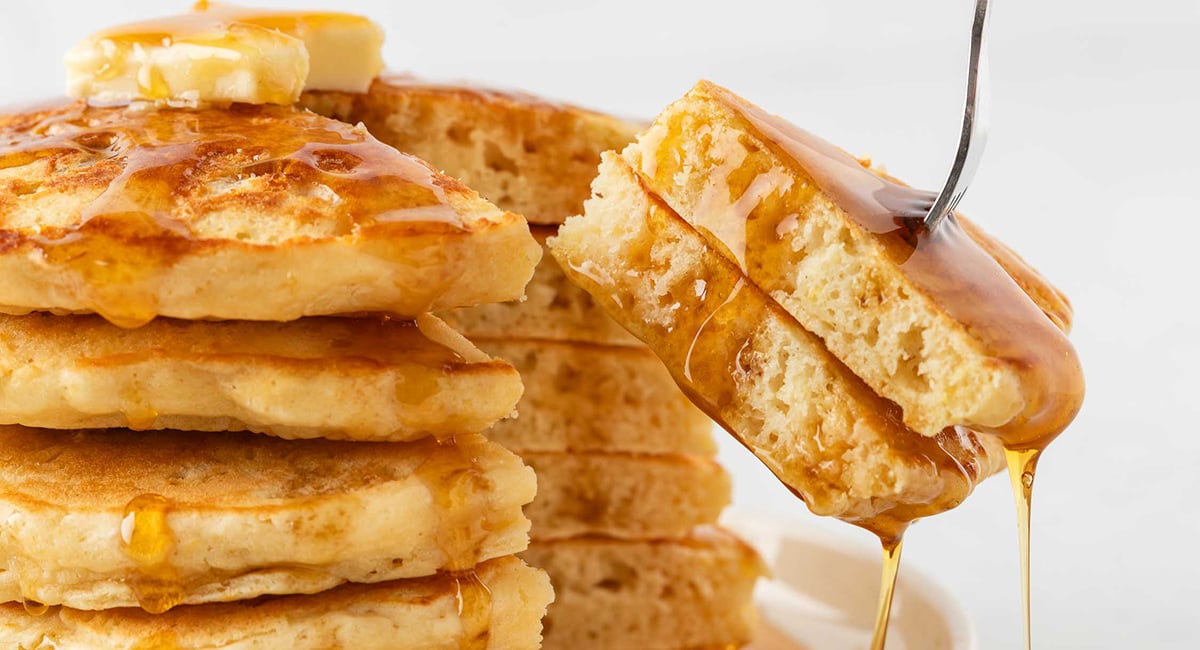
Pancakes stand as a resolute hero of the breakfast table, a comfort food that evokes warmth, indulgence, and the promise of a delightful start to the day. While seemingly simple, many home cooks grapple with achieving that elusive, perfect stack: golden brown, impossibly fluffy, and cooked through without a hint of doughiness. The secret, more often than not, lies not just in the ingredients, but in understanding your batter and, crucially, avoiding the common pitfall of overmixing. Mastering these elements transforms the humble pancake into an eggy, salty, and subtly sweet masterpiece. So, if you've ever wrestled with dense, chewy pancakes or those with burnt bottoms and raw interiors, prepare to unlock the secrets to truly superior homemade pancakes that will impress every time.
The Foundation of Fluffiness: Understanding Your Batter
Great pancakes don't happen by accident; they begin with a well-crafted batter. A properly balanced and mixed batter is the cornerstone of achieving that light, airy texture everyone craves. When learning how to make homemade pancakes, understanding each ingredient's role and the mechanics of mixing is paramount.
Beyond the Basics: Essential Ingredients for Superior Pancakes
While the list of pancake ingredients might seem straightforward, the correct ratio and quality make all the difference. Here’s a breakdown of what makes your homemade pancakes truly special:
- Buttermilk: This isn't just for tang; it's a key player in fluffiness. Buttermilk's acidity reacts with baking soda (and sometimes baking powder, if present) to create carbon dioxide bubbles, which are trapped in the batter, giving pancakes their signature lift. The tang also contributes to a delightful, custard-like interior. If you don't have buttermilk, a simple homemade substitute can be made by adding a tablespoon of lemon juice or white vinegar to regular milk and letting it sit for 5-10 minutes.
- Eggs: Eggs contribute richness, structure, and a beautiful golden hue. They help bind the ingredients and add to the custardy texture within, ensuring your pancakes are tender and moist.
- Baking Powder & Baking Soda: These are your leavening agents. Baking powder provides an initial lift when mixed with liquids and a second lift when exposed to heat. Baking soda works primarily with acidic ingredients like buttermilk to produce gas. Using both in the right balance ensures maximum rise and a light crumb.
- Sugar: While you might be tempted to load up on sugar, the right amount helps crisp the edges and contributes to browning without pushing your pancakes into dessert territory. A little goes a long way. Remember, if you're serving with syrup, you likely don't need excessive sugar in the batter itself.
- Salt: Often underestimated, salt is vital for seasoning your pancakes, just like any other food. It balances the sweetness, enhances the other flavors, and prevents your pancakes from tasting flat. Don't be afraid of the suggested amount; you'll miss it if you cut back.
- Flour: All-purpose flour is the standard. Different flours can be experimented with for varying textures, but for classic fluffy pancakes, all-purpose is typically ideal.
The Golden Rule: The Art of Mixing (and Not Overmixing)
This is arguably the most critical step when you're learning how to make homemade pancakes. The way you combine your ingredients directly impacts the pancake's final texture. Here's the correct approach:
- Combine Dry Ingredients: In a large bowl, whisk together all your dry ingredients (flour, sugar, baking powder, baking soda, salt). This ensures the leavening agents and seasoning are evenly distributed throughout the flour, preventing pockets of unmixed ingredients.
- Create a Well: Form a "well" in the center of your dry ingredients. This creates a pocket for the wet ingredients.
- Add Wet Ingredients: Pour the buttermilk and crack the eggs directly into the well. There's no need to combine the eggs and buttermilk separately; let's save on washing extra bowls!
- Gentle Incorporation: Starting from the center of the well, gradually begin incorporating the dry ingredients into the wet. Use a whisk or a fork. The goal is to mix *just* until no obvious dry bits of flour remain.
- Embrace the Lumps: This is where the magic happens and where many home cooks falter. Pancake batter should never be overmixed. Overmixing develops gluten in the flour, which leads to tough, chewy, and dense pancakes rather than the light and airy ones you desire. Think of it like a muscle contracting – the more you work it, the stronger (and chewier) it gets. A few lumps in your batter are not only acceptable but desirable. They will sort themselves out during the cooking process. Seriously, resist the urge to whisk away every last lump!
Preparation Perfection: Setting Yourself Up for Success
Beyond the batter, thoughtful preparation before you even touch the griddle can significantly streamline your cooking process and ensure a smoother experience when making homemade pancakes.
Prepping Your Pantry and Your Plate
- Mise en Place: This French culinary term means "everything in its place." Before you start mixing or cooking, have all your ingredients measured out and ready. This means dry ingredients in one bowl, buttermilk poured, and butter melted and cooled. This prevents last-minute scrambling and allows you to focus on the cooking process.
- Keep Pancakes Warm: If you're cooking for more than one person, keeping the first pancakes warm while you finish the batch is essential for serving them all at once. Heat your oven to a low temperature (around 325°F or 160°C). Place a wire rack on a baking tray and transfer cooked pancakes to the oven until ready to serve. This keeps them toasty without making them soggy.
Choosing Your Canvas: The Right Cookware & Tools
The surface you cook on and the tools you use can greatly impact the outcome of your homemade pancakes.
- Griddle: A large electric griddle is often considered the ideal surface as it provides an expansive, even heating area, allowing you to cook multiple pancakes simultaneously at a consistent temperature.
- Cast-Iron Skillet: If a griddle isn't available, a well-seasoned cast-iron skillet is an excellent alternative. It distributes heat beautifully and, with proper care, offers a naturally nonstick surface. Its heat retention also helps maintain a steady temperature.
- Nonstick Skillet: A good quality nonstick skillet is another reliable option, providing ease of flipping and cleanup. Ensure it's large enough to comfortably accommodate at least two pancakes.
- Whisk or Fork: For mixing your batter, a standard whisk or even a fork will suffice, especially given the gentle mixing required.
- Spatula: Invest in a large, wide, angled, and heatproof spatula. A flexible metal fish spatula is surprisingly adept for pancakes, offering the perfect width and flexibility to get underneath the pancake without tearing it, ensuring a clean flip.
- Measuring Cups & Spoons: Accuracy in measurements, particularly for leavening agents, is key for consistent results.
Cooking with Confidence: From Batter to Golden Perfection
With your perfect batter ready and your station prepped, the next stage involves patience and engaging your senses to achieve beautifully cooked, golden, fluffy pancakes.
Mastering the Heat: The Secret to Even Browning
Finding the correct heat setting is crucial and often takes a little practice with your specific stovetop and pan. Too high, and you'll get burned bottoms with raw interiors. Too low, and your pancakes will dry out before they're cooked, becoming dense.
- Preheat Properly: Always preheat your griddle or skillet over medium-low to medium heat for several minutes before adding batter. A drop of water should sizzle and evaporate quickly but not instantly.
- Listen and Look: Pour a small amount of batter (about ¼ cup for standard pancakes) onto the heated, lightly greased surface. Listen for a gentle sizzle. Watch for tiny bubbles forming on the surface of the pancake. This indicates that the leavening agents are activating, and the pancake is cooking through. The edges will also begin to look set.
- Smell: Use your nose! A sweet, toasty aroma indicates pleasant browning. A sharp, slightly acrid smell means it's burning. Adjust heat as needed between batches.
The Flip: Timing is Everything
Knowing when to flip is the difference between a perfectly cooked pancake and a deflated mess.
- When to Flip: Wait until numerous bubbles have formed and popped across the entire surface of the pancake, and the edges look dry and set. The center may still appear slightly wet, but the structure should be firm enough to hold. This usually takes 2-3 minutes per side.
- The Confident Flip: Slide your wide spatula gently but confidently under the pancake. With a quick, smooth motion, turn the pancake over. Avoid pressing down on the pancake after flipping, as this can compress the air bubbles and make it less fluffy.
- Cook the Second Side: Cook for another 1-2 minutes on the second side, or until golden brown and cooked through.
Elevate Your Pancake Game: Tips for Next-Level Indulgence
Once you've mastered the fundamentals of how to make homemade pancakes, don't be afraid to experiment and personalize your creations.
- Mix-Ins: While a classic pancake is delightful on its own, adding mix-ins can elevate the experience. Try chocolate chips, fresh blueberries, thinly sliced bananas, or a sprinkle of toasted pecans or walnuts. Add them to the wet batter just before pouring onto the griddle, or sprinkle them directly onto the batter once it's on the cooking surface for more even distribution.
- Flavor Enhancers: A touch of vanilla extract in the wet ingredients can add another layer of warmth and sweetness. Zest from an orange or lemon can brighten the flavor profile, especially with berry pancakes.
- Serving Suggestions: Beyond maple syrup, consider fresh fruit, whipped cream, a dollop of Greek yogurt, a dusting of powdered sugar, or a homemade fruit compote. For a savory twist, some enjoy pancakes alongside crispy bacon or sausage.
- Rest the Batter (Optional): While not strictly necessary, some recipes suggest letting the batter rest for 10-15 minutes after mixing. This allows the flour to fully hydrate and the gluten to relax further, potentially leading to even more tender pancakes. Just don't stir it again before cooking!
Making homemade pancakes doesn't have to be a daunting task filled with kitchen mishaps. By understanding the crucial role of your ingredients, mastering the gentle art of mixing to avoid over-developing gluten, and practicing patience with your cooking technique, you can consistently achieve that coveted fluffy texture. So gather your ingredients, follow these steps, and prepare to delight yourself and your loved ones with a stack of perfect, golden, fluffy pancakes that are truly an indulgence worth mastering. For more in-depth knowledge on tools and ingredients, dive into our guide on Best Homemade Pancakes: Essential Tools, Ingredients, & Cooking Secrets.